Sunday, October 20, 2013

Liming Wax 101

I've been wanting to try Brimax's Liming Wax for awhile now. It promises to give an aged, whitewashed, "Restoration Hardware" look...without the hassle of the 1/2 paint, 1/2 water whitewash technique. All my searching online only brought up images of the wax used on lighter wood and not the darker stained table I was wanting to use it on. In the end, I decided to just go with it (and am now spreading it on everything I can get my hands on)...here's a few tips:


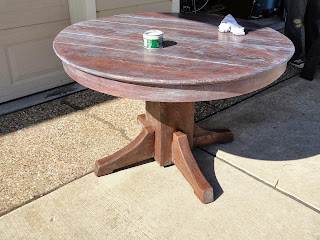
Liming wax is a smooth, white paste. It can be applied to bare wood, as well as stained and sealed wood. It works best when the paste can get into the grain, so some roughing up might be in order. Here's a before pic of the table I used it on. It had a good coat of gloss or poly on it, so I went over it with a sandpaper block. I also used a wire brush in a few areas to open up the grain and cracks.


Here is is halfway through. You can see how the liming wax is getting down into the grain and providing a whitewashed look to other areas.


The contrast of the limed top to the bottom.


Here's the finished top. There's one spot over on the right I want to add more to. They suggest putting a coat of clear wax on to seal it. I started to use my Annie Sloan Clear Wax and it acted almost like an eraser. So, I stopped.

liming wax

I'm loving the driftwood, whitewashed new look it gives to the table. It took like 30 min. and I barely used any wax (it's a little pricey at $20/can. But, I barely put a dent in it).

liming wax
Liming Wax 101
Then, I got this crazed look in my eye...what else could I put this magic paste on? We've had the table below for too long now. It's a simple coffee table on steel, hairpin legs. We've brought him to numerous shows, but alas, nobody wants to take him home.


Here's the top after a coat of liming wax and some of Annie Sloan's clear wax. What a difference! The white wax got down into some deep holes and cracks and the clear wax took away some of the hard edge of the liming wax. Leaving a lovely aged piece.

liming wax

I would love to know...what do you think of the liming wax look? Would you try it?

Tuesday, October 15, 2013

Playing Around with Mustard Seed Yellow Milk Paint

The countdown is on...28 days until we close on our house. And, I have no less than five pieces of furniture to paint and seven chairs to recover. First up, this sideboard. Here it is in it's natural state.


It's from my mother-in-law and I painted it for the first time last year (painted sideboard reveal). At the time, in blended in with our walls and decor. I was only a little thrilled with it.


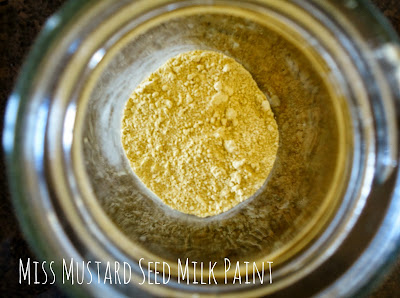
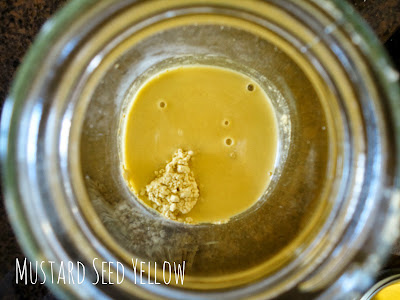
Now that we are moving into a new space, we are trying to work in some color. We've gone back and forth on palettes. Our first purchase was a navy, velvet couch. Next up, an earthy, green chair and blue/natural chevron rug. We contemplated orange for an accent color. Or, purple. Finally, we settled on yellow. Miss Mustard Seed Yellow to be more specific.

Mustard Seed Yellow

 Mustard Seed Yellow

Since this paint is know for it's unpredictable chippiness and I didn't want any of the former finish to come through, I gave it a coat of paint. (Oh...and stripped the top).


 Also, since I am totally impatient, I painted it almost immediately with the milk paint. This ensued...


In some areas, the milk paint stripped the paint right down to the original finish. In other cases, it stripped off the last coat I put on, down to the coat I hoped to hide. In all cases, it took off the last coat I put on (I'm guessing I didn't let it cure long enough?). Lesson learned.

Here's what I was left with. I did no distressing. Just flaked off the chips and gave it a coat of dark wax:

Mustard Seed Yellow Sideboard


Here's a look with the newly stained top (please forgive me for the poor lighting).

Miss Mustard Seed Yellow

Miss Mustard Seed Yellow
 
Miss Mustard Seed Yellow

 Miss Mustard Seed Yellow

The wax deepened and darkened the yellow and I love it. It will be the very first thing you see when you walk in our new house...I can't wait to move it in!

Linking to:
http://www.elizabethandco.blogspot.com/
Wow Us Wednesdays

Thursday, October 3, 2013

Upcoming Show Preview: Boulevard St. Louis Etsy POP!up Shop

In typical RDFCo. fashion, we're making a made scramble to get ready for a show next weekend. I guess it's just a part of our creative process :-) 

We're looking forward to trying out a new venue here in St. Louis. The Boulevard is home to tons of great little shops and restaurants and a whole new potential client base. And, I can't wait to team up again with so many great STL Etsy shops, including:

www.kakabaka.com
http://www.etsy.com/shop/emkcreations
http://carriejeanhawkins.etsy.com/
http://www.etsy.com/shop/sewgoodandtrendy
http://www.etsy.com/shop/Parsimonia
www.Etsy.com/shop/TheWeavingGuys
http://www.etsy.com/shop/PattySheppardArt
www.sticktoyourknittin.etsy.com
http://downzipper.etsy.com/
http://www.etsy.com/shop/AnnaOurthJewelry?ref=si_shop


The Boulevard St. Louis Etsy POP!up Shop will take place Saturday, Oct. 12 from 10 a.m. - 3 p.m.

The Boulevard St. Louis Etsy Pop!up Shop on Oct. 12

We'll be bringing out a few pieces we've had on-hand, as well as bringing along some new things we've been working on. Here's a sneak peek:

Live edge coffee table on stainless steel hairpin legs
Gold and Blue Tray
Footstool with recycled grain sack


Sofa table with reclaimed boat wood
Side table from old Paris door
If you're in the St. Louis area, stop on by and say hi! It's a great chance to get a head start on all that holiday shopping.