Showing posts with label DIY. Show all posts

Sunday, October 20, 2013

Liming Wax 101

I've been wanting to try Brimax's Liming Wax for awhile now. It promises to give an aged, whitewashed, "Restoration Hardware" look...without the hassle of the 1/2 paint, 1/2 water whitewash technique. All my searching online only brought up images of the wax used on lighter wood and not the darker stained table I was wanting to use it on. In the end, I decided to just go with it (and am now spreading it on everything I can get my hands on)...here's a few tips:


Liming wax is a smooth, white paste. It can be applied to bare wood, as well as stained and sealed wood. It works best when the paste can get into the grain, so some roughing up might be in order. Here's a before pic of the table I used it on. It had a good coat of gloss or poly on it, so I went over it with a sandpaper block. I also used a wire brush in a few areas to open up the grain and cracks.


Here is is halfway through. You can see how the liming wax is getting down into the grain and providing a whitewashed look to other areas.


The contrast of the limed top to the bottom.


Here's the finished top. There's one spot over on the right I want to add more to. They suggest putting a coat of clear wax on to seal it. I started to use my Annie Sloan Clear Wax and it acted almost like an eraser. So, I stopped.

liming wax

I'm loving the driftwood, whitewashed new look it gives to the table. It took like 30 min. and I barely used any wax (it's a little pricey at $20/can. But, I barely put a dent in it).

liming wax
Liming Wax 101
Then, I got this crazed look in my eye...what else could I put this magic paste on? We've had the table below for too long now. It's a simple coffee table on steel, hairpin legs. We've brought him to numerous shows, but alas, nobody wants to take him home.


Here's the top after a coat of liming wax and some of Annie Sloan's clear wax. What a difference! The white wax got down into some deep holes and cracks and the clear wax took away some of the hard edge of the liming wax. Leaving a lovely aged piece.

liming wax

I would love to know...what do you think of the liming wax look? Would you try it?

Thursday, September 12, 2013

Steppin' up to a ReDesign Challenge

There are so many great fall festivals and events around St. Louis this year. Sadly, we've had to limit RDFCo. to two. Trust me, it wasn't easy not applying to some of our faves. Somehow I managed to sit on my hands until the application periods were over.

We're currently gearing up for an Etsy Pop-Up in early October (we'll be sharing more info soon). A few days after that, we're taking on a whole new challenge. We were tapped to participate in a local fundraiser called Lost + (F)ound to benefit Perennial (a community workshop and store in St. Louis offering educational programming in creative reuse and sells creatively repurposed home furnishings and eco-friendly supplies for reuse projects.)


Besides the promise of wine, beer, pie and paper pinwheels, the event also features a ReDesign Challenge. Local artists, architects and designers are given three windows and have to transform them into a usable and functional piece for the home. The items are auctioned off at the event, with all proceeds benefiting Perennial. Since I love a good competition, I said hell yes!

Last week we picked up our windows. We aren't allowed to purchase anything new for them. We can take them apart and use fasteners to create a unique piece. They also provided us with green paint strippers and paint. We've already been kicking around some ideas & I can't wait to get started. Stay tuned for an update!

Sunday, December 2, 2012

How to Decorate for the Holidays for $10

For the last three years, I've decorated my tabletops, mantle AND buffet for Christmas on the cheap. $10 to be exact. My secret?

$10  White Pine garland at Home Depot.

It's easy to work with, gives the house a fresh, piney, Christmasy smell, and makes a huge mess.

Three things I look for in every project I do.

To be fair, I have an arsenal of other decor I add to my piney friend. Pine cones, red berries, shells (we like it beachy around here), and DIY mercury glass with candles (click here for a tutorial...it's soo easy to do!) all play a part. After the holidays, they get packed up and wait until it's time to come out again.

I'm able to get alot of mileage out of the garland. It goes on the Breakfast Room table.

Breakfast Room

On the buffet in the Dining Room.


Buffet

 On the Dining Room table.

Dining Room Table

 And, on the mantle.

Mantle

I've been using this same theme for the last several years. I could change things up. But, I love it.

If it ain't broke, don't fix it!

Monday, November 19, 2012

Painted Sideboard Reveal

I've been waiting all week to show you the finished sideboard! It's been so dark outside before I leave for work and when I come home, I haven't been able to snap some good pics. Until now!

This piece was found by my mother-in-law, JoAnn, who passed away last November. So, it has special meaning for us. She loved to go antiquing and we had very similar tastes. We were always sharing our latest antique store finds and this was a beautiful piece that she picked up. We miss her so much...I  just hope she likes what I did with it!

We debated keeping the top stained, but as you can see below, there are some stains on the top. And, I wasn't really up for sanding or stripping it all down. Also, some of the wood inlay was chipping off in spots and I was afraid that would get more damaged. The shelf on the inside is a little warped, too. But, other than that, it's in great shape!

BEFORE
 
sideboard with Annie Sloan Chalk Paint
Sideboard Before
I started by dry brushing it with Annie Sloan Chalk Paint in Pure White. Basically, I never put alot of paint on the brush and I didn't cover it completely. It was a pretty light coat.
sideboard with Annie Sloan Chalk Paint

Next, I painted it in ASCP Paris Grey. I didn't do a very heavy coat of this either. And, applied it really thin in some areas. It really helped when I started distressing it.

sideboard with Annie Sloan Chalk Paint

sideboard with Annie Sloan Chalk Paint


 Then, I went over it again and added some of the Pure White in different areas and the Martha Stewart Metallic Paint in Vintage Gold. I really had no plan to this...I just added it in different places.

sideboard with Annie Sloan Chalk Paint

sideboard with Annie Sloan Chalk Paint

Then I started sanding! In hindsight, I should have done this in the garage, as it was pretty messy. And, I'm now banned from distressing in the house. But, it just isn't as toasty outside!

I heavily distressed it on the top and front. You can just slightly see where some of the gold peeks thru.
sideboard Annie Sloan Chalk Paint

sideboard Annie Sloan Chalk Paint

Then, I applied a coat of Annie Sloan's dark wax and buffed it until it was buttery smooth. I absolutely love it! There are so many different "layers" to the finish. Hints of white, grey, gold and the natural wood coming through. The dark wax gives it a nice antique look and darkens up some of  the paint.

sideboard Annie Sloan Chalk Paint

sideboard Annie Sloan Chalk Paint

This isn't the ideal spot for it -- I want it in a room where there is more contrast with the walls. But, this is the only spot we have right now. It's my little Annie Sloan corner!  I'm glad I stepped out of my comfort zone and added some of the gold highlights.

sideboard Annie Sloan Chalk Paint

Would love to hear your thoughts...do you like the gold accents? Does it "naturally" blend in? Thanks for taking the time to stop by!

Linking to these great sites:


Wednesday, November 14, 2012

Painted Sideboard Sneak Peek

Last night I started working on this antique sideboard. It has some really great elements to it (carved details on the trim and legs) and I wanted to try my hand at a few new techniques. I'm hoping to finish it up tonight, but here's a peek at what it looks like so far. Forgive me for the camera phone pics...I just took these quickly this morning.

I was inspired by a couple of videos: This dry brushing tutorial from Shaunna West at Perfectly Imperfect. Also, this video by Virginia Weathersby is a great example on how to add the gold accents.

I'll be practicing my dry brushing skills with two ASCP colors and have incorporated a gold paint. I went with a paint that Martha Stewart sells. If you look closely below, you can see it in the carved trim.

distressed side board annie sloan

I love the way it is turning out...I can't wait to show you the finished piece later this week!

Thursday, November 1, 2012

Weekend Plans: Paint, Paint, Paint

I started this post as a way for you to take a look at what we've been working on for our last two shows of 2012. Now, it's become more of a to-do list of everything that needs to be done for next weekend's event: the Chandler Hill Annual Harvest & Holiday Market. This one is super close to our house and Chandler Hill is one of our favorite wineries. It will be a great place to meet some new people.

It's going to be a busy weekend, but here's what we'll be finishing up. We'll have alot of home decor items for this show. Chalkboards, mirrors, vintage frames. We've also put together a cute wall vase using recycled wine bottles.

Red Door Furniture Co

Red Door Furniture Co

Jeff's been working on a bar/buffet table that I'm really excited about. I'm looking forward to styling it next weekend. In the meantime, it will be getting a coat of paint on the legs. I'll be trying a new distressing technique and if I'll goes well, I'll share it next week!


If you are in the St. Louis area, come join us Saturday, Nov. 10th from 11:30 a.m. - 4:30 p.m. There's a great line-up of vendors. As well as the usual picturesque atmosphere and fantastic wine!


Thursday, October 25, 2012

Store Spotlight: Sesame & Lilies

A couple of weeks ago, Jeff and I took a vacation and headed to the Pacific Northwest. Among our stops was Cannon Beach. It was our first time in that area and it was gorgeous!


During the planning process, I stumbled upon a home store located in Cannon Beach called Sesame and Lilies. I knew from the website that I would fall in love....and I did! So, I wanted to take you on a little tour of what I saw and offer suggestions on where you can find some of the same looks.

Sesame and Lilies

They have room after room of beachy, one-of-a-kind home decor, clothing, jewelry, bath items, kitchen items and much, much more. It was a little overwhelming!

Burlap and linen (natural looking fabrics) are still going strong. I love this paired with the tufted look! It really softens and dresses these fabrics up. 
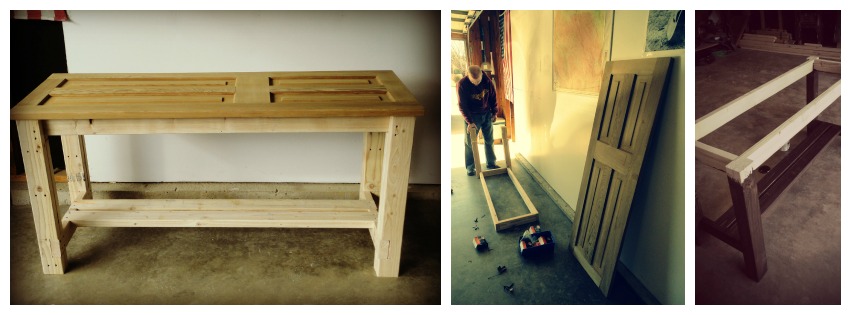
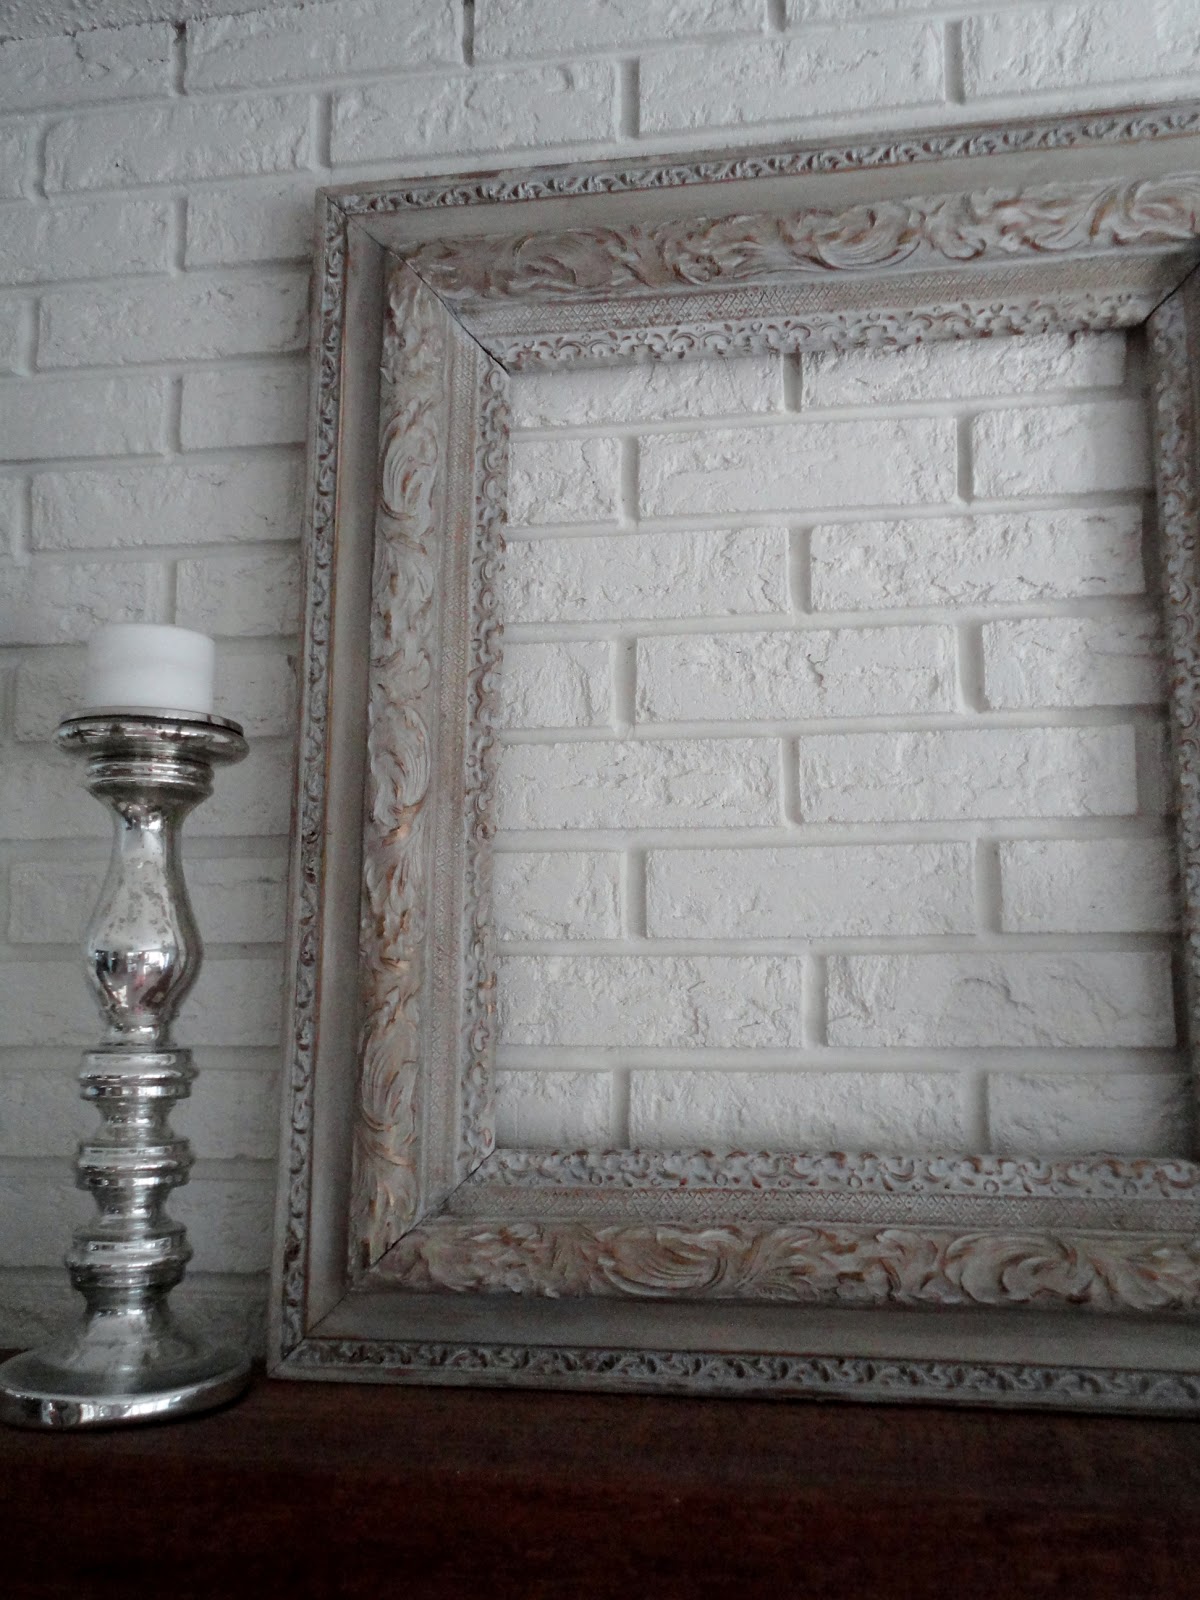
Here's a similar tufted chair. And, the large mirror would be an easy DIY project...distress some lumber (or use barnwood if you are lucky to have some) and make a frame for the mirror size of your choice.

Sesame and Lilies
Sesame and Lilies Tufted Chair

The raw edged stitching on the cushions below would be easy for a newbie sewer like me! And, some DIY hand stenciled pillows are easy, too.

Sesame and Lilies
Sesame and Lilies Chair and Pillows

I can't get enough of driftwood (like the bowl below). And the mini, distressed buoys were too cute.


This chandy made out of recycled bottles was huge -- a great statement piece for a dining room!

Sesame and Lilies Chandelier

This collection of glass domes is a unique way to display and highlight items on a shelf or buffet. Grab the latest 50% off coupon and head over to Hobby Lobby to pick some up! And we are constantly seeing architectural pieces at shops around STL that would make a great base for a lamp. Definitely something I want to add to our to-do list.

Sesame and Lilies
Sesame and Lilies Glass Dome Display
These signs are all over the place. Make your own or pick one up.

Sesame and Lilies

These over-sized glass jugs are totally beachy...but, take up alot of room as a centerpiece. I love the colors and think I would try the same look with different mason jars.

Sesame and Lilies
Sesame and Lilies

Sesame and Lilies

 I'm always look for different chipped paint/distressed looks. Great color combs here, with the blue, green, gold and white.

Sesame and Lilies

Sesame and Lilies

Another room and another spectacular chandelier. This one looks like it had been painted. I have one in our basement that I'll be taking some Annie Sloan Chalk Paint to soon.

Sesame and Lilies


 Another great table scape. I spy a burlap runner, vintage bottles, antique glass insulators and
 rustic farmhouse table.  Swoon!


 Still seeing tons of antlers out there, even in the Pacific NW! I have these that I painted a few weeks ago.


Last, but not least, another perfect paint chipped table (piled high with sweet soaps, lotions and candles).

Sesame and Lilies
Thanks for taking a tour with me! I barely scratched the surface of what Sesame and Lilies has to offer. It's definitely worth a stop...just make sure you have an hour or two ;-)

Where is your favorite local home decor shop? Would love to hear about some of your faves!

Monday, October 22, 2012

Wet Distressing with Annie Sloan Chalk Paint

I've been wanting to paint a gold picture frame ever since I took part in an Annie Sloan Chalk Paint demo in July. So, when I spied this large, old frame at the antique store, I knew it would be perfect.


The cracks and scrolls are calling out to be distressed!


First, I gave it a coat of AS Paris Grey.


One of the techniques we used in the workshop was wet distressing. Once the paint is just dry, take a damp cloth and wipe off the paint. This removed the Paris Grey, but didn't scratch the gold underneath.

annie sloan wet distressing

annie sloan wet distressing

Then I took some Pure White and brushed that on. I didn't completely cover every surface. That's one of the things I love about AS paint....you don't have to be perfect.

annie sloan wet distressing

Then, some more wet distressing and distressing with fine sandpaper.

annie sloan wet distressing

 After that, it was a coat of AS dark wax. It made everything POP! And, once the wax was rubbed in and polished, to is buttery smooth.

annie sloan wet distressing

annie sloan wet distressing

It has the most perfect antique French look! To finish it off, I'll be adding some twine to the middle section. It will be a cute way to display jewelry or photos.


It has great depth and looks like there are so many layers...yet it was really a simple process!

annie sloan chalk paint


annie sloan wet distressing

Linking to:
The Girl CreativeDIY Show Off